
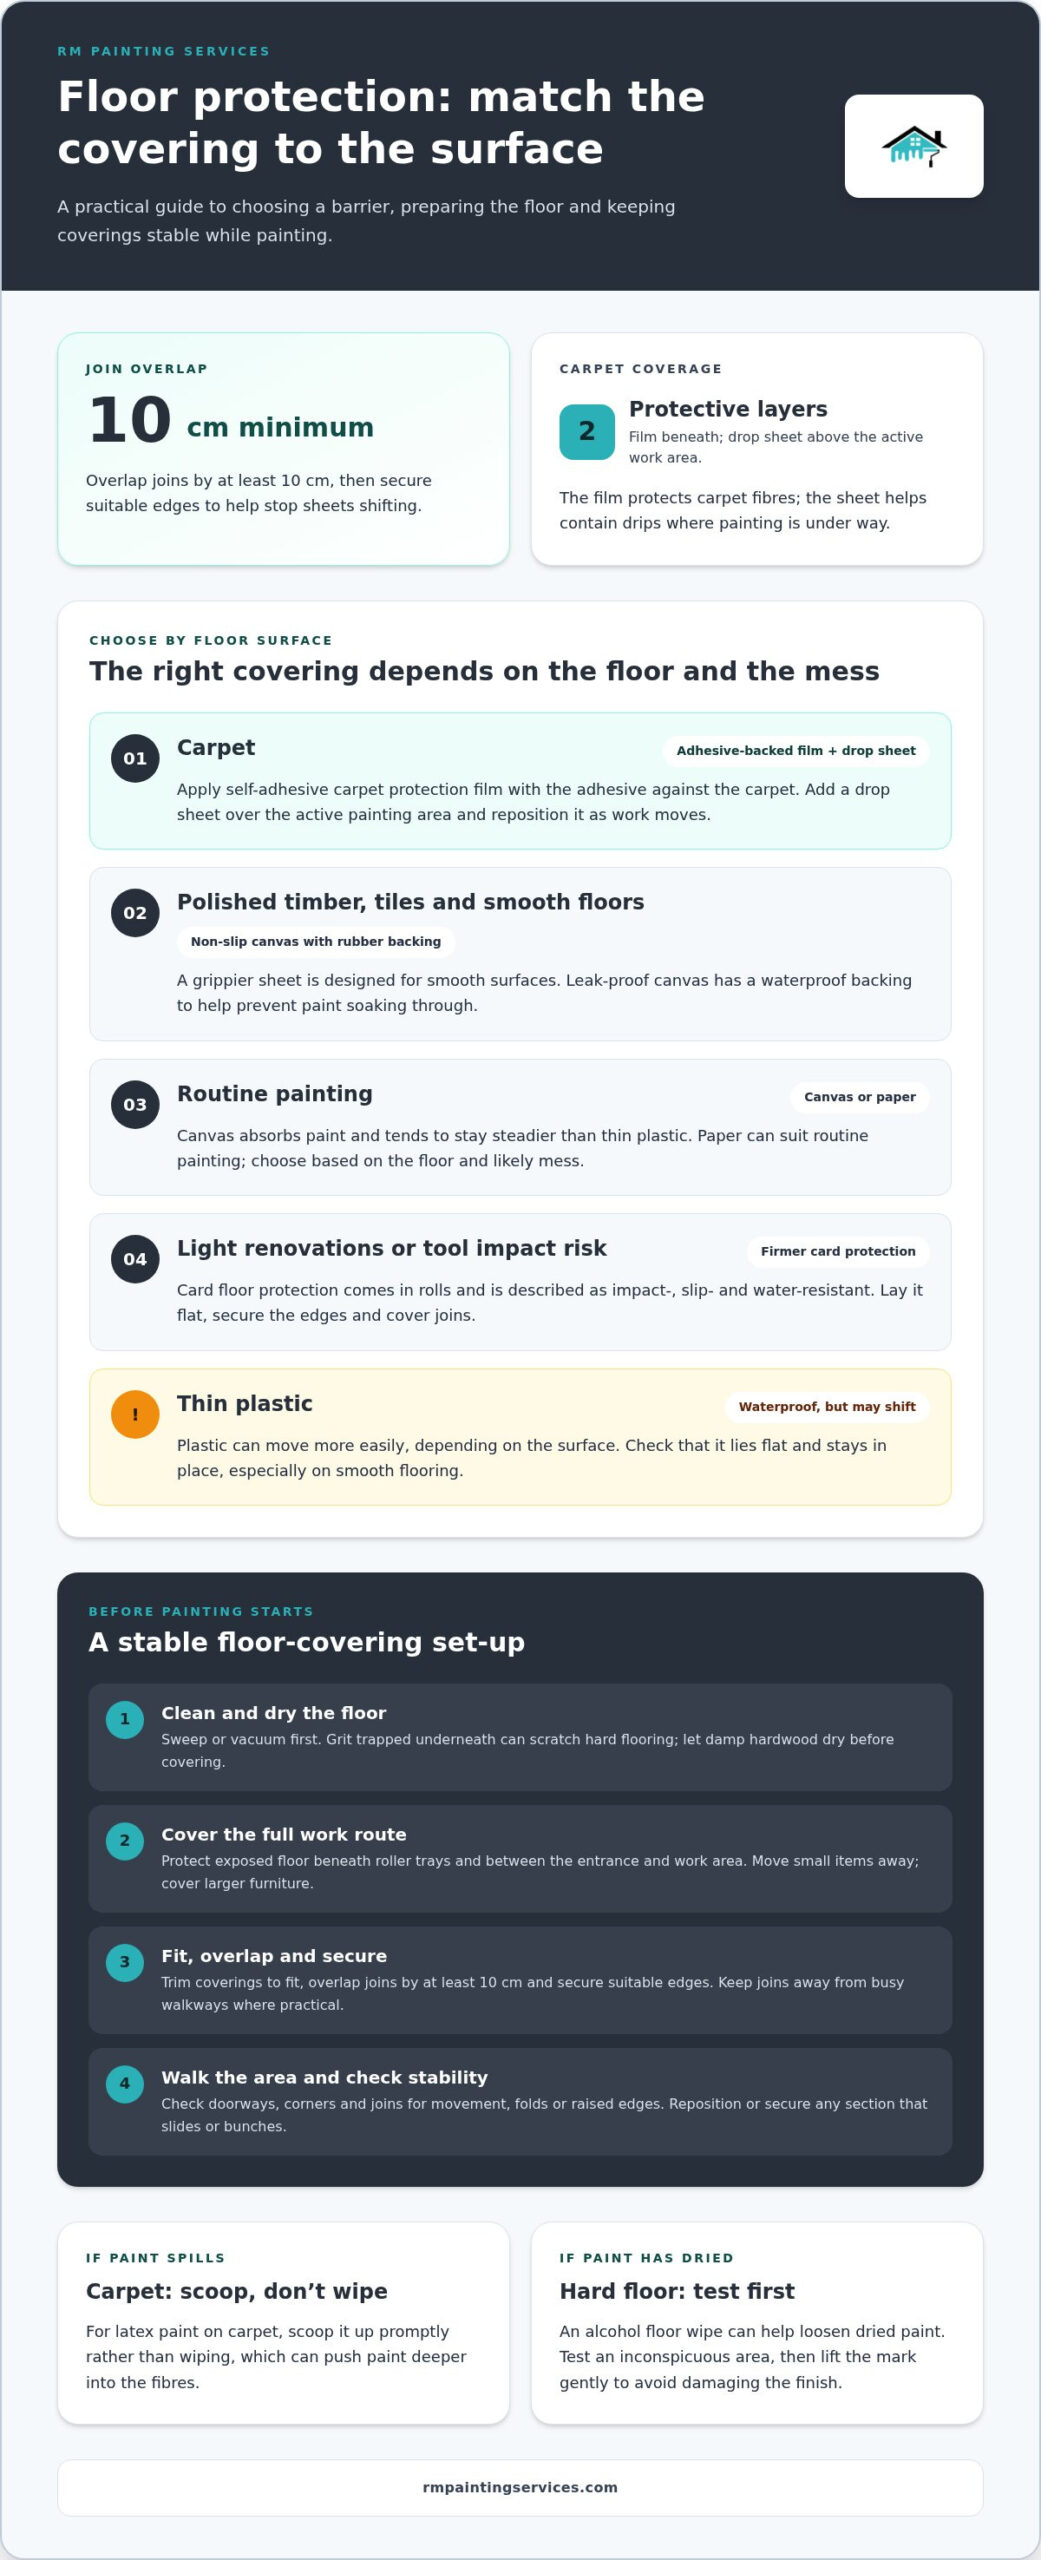
The practical answer to how painters protect floors is to match the covering to the surface. On carpet, use self-adhesive carpet protection film, with a drop sheet over the active painting area; on hard floors, choose a stable covering suited to the finish. Sweep or vacuum first, overlap joins by at least 10 cm and keep coverings flat to reduce gaps and trip risks.
It’s easy to focus on paint colour and overlook the risk dust, drips and shifting sheets pose to floors. A little preparation helps keep the work area orderly and makes clean-up simpler.
This guide explains how painters protect floors, secure coverings and choose between paper, canvas and other options for painting or light renovations. You’ll also find practical steps for handling spills and protecting furniture and nearby surfaces while work is under way.
Key Takeaways
- Choose self-adhesive carpet film for carpet, and add a drop sheet where painting is under way.
- Sweep or vacuum before laying coverings, overlap joins and secure loose edges to help reduce movement and trip hazards.
- Match the covering to the floor: absorbent canvas, protective paper or firmer card can suit different surfaces and risks.
- For painting at home, RM Painting Services protects floors and furniture, cleans up daily and provides a clear quote before work begins.
How do I protect carpet when painting?
On carpet, apply adhesive-backed protection film, then place a drop sheet over the active painting area. This layered approach helps guard against paint spills and drips.
-
Choose adhesive-backed carpet protection
Cover the carpet with adhesive-backed protection before bringing paint or tools into the room. The film creates a barrier across the fibres, helping stop spills from reaching deeper into the carpet. Start at one edge and work across the floor, smoothing the material as you go. A flat covering is easier to walk on and less likely to catch shoes or equipment.
Check that the film sits securely, especially near doorways and furniture legs. Keep the protector clear of wet paint, and replace any section that becomes torn or heavily soiled. Protect a narrow route to the work area too. Paint can be carried on footwear, trays and brushes, not just dropped beneath the wall.
-
Apply carpet protector film
Lay self-adhesive carpet protection film with its adhesive side against the carpet. The built-in adhesive means you don’t need to tape the film down. Press it into place gradually rather than stretching it across the carpet. Check the edges as you work to keep them flat and prevent them curling underfoot.
Add a drop sheet over the film where painting is under way. This second layer helps contain drips around a roller tray or beside the wall. Keep the sheet within the protected area and reposition it as work moves. If paint lands on carpet, act promptly. Family Handyman advises scooping up latex paint immediately rather than wiping it, which can push paint deeper into the fibres.
Need Dependable Floor Protection Before You Start?
In Tralee, Kerry, use stable floor coverings, keep walkways clear and secure loose edges. Sweep or vacuum first, then check that coverings lie flat underfoot.
-
Clean the floor before covering
Sweep or vacuum the floor before laying any covering, including canvas or plastic. Grit trapped underneath can scratch a hard surface as people walk across it. Check hardwood for dampness and let it dry before covering. Trapped moisture can affect the surface, so don’t lay protection over a wet floor.
-
Cover furniture and exposed floor areas
Move small items such as lamps, ornaments and electronics out of the work area. Group larger furniture away from the wall, then cover it with clean sheeting or a protective cover. Extend floor protection beneath roller trays and along the route between the entrance and work area. This helps guard exposed patches from drips and paint carried on shoes.
-
Trim and secure floor coverings
Cut coverings to fit the room without leaving loose corners or long, raised edges. Overlap joins by at least 10 cm, then secure suitable edges so sheets don’t shift as people move equipment. Avoid sticking tape to a newly refinished floor, as it may damage the finish. Keep joins away from busy walkways where practical.
-
Check coverings for stability
Walk across the protected area before painting starts. Check doorways, corners and joins for movement, folds or edges that lift underfoot. Plastic can shift on smooth flooring, so make sure it lies flat and stays in place. Reposition or secure any section that slides or bunches before carrying paint through the room.
Choosing flooring paper for painting and light renovations
When considering how painters protect floors, match the covering to the surface and likely mess. For wall painting, lay suitable protection flat across the work area and secure its edges.
-
Choose surface-specific floor protection
Choose a drop sheet or protective film suited to the floor. A non-slip canvas sheet with rubber backing is designed for polished timber, tiles and other smooth surfaces. Leak-proof canvas has a waterproof backing to help prevent paint soaking through.
Canvas absorbs paint and tends to stay steadier than thin plastic. Plastic is waterproof but may shift more easily, depending on the surface. Choose according to whether spill absorption, a waterproof barrier or grip matters most.
-
Select flooring paper for light renovations
Consider paper or card protection for hard floors during painting and light renovations. Card floor protection comes in rolls and is described as impact-, slip- and water-resistant. Lay it flat, secure the edges and cover joins to prevent paint reaching exposed flooring.
Paper can suit routine painting, while firmer materials help where tools or equipment could mark the floor. Choose for the task, not just the paint: moving a tool across a busy area creates a different risk from catching small drips beside a wall.
- For dried paint on a hard surface, an alcohol floor wipe can help loosen the mark. Test an inconspicuous area first, then lift the paint gently to avoid damaging the finish. On carpet, scoop up latex paint spills promptly rather than wiping paint into the pile.
- Before work begins, check the floor finish and how the covering will sit on it. Smooth tile may need a grippier sheet than another surface. A practical part of how painters protect floors is choosing materials for the surface and keeping them flat throughout the work.
Risks to floors during painting and renovation
Paint drips, sanding debris, moving furniture and shifting coverings can all mark or scratch flooring. Painter’s tape can damage a newly refinished floor, so don’t apply it to that finish.
-
Identify risks to floors during renovation
Check the full work route before starting. A roller tray beside a wall can spill, while shoes may carry paint between the tray and doorway. Sanding creates debris that can scratch floors underfoot or when trapped beneath coverings. Dragging a table or chair can also scuff the finish.
Plan protection around each task. Keep a washable, reusable cotton dust sheet beneath the painting area, and add protection under trays. If sanding is planned, use dust extraction tools, then vacuum and wipe the area before painting.
-
Check whether tape may damage floor finishes
Check the floor finish before using masking or painter’s tape near its edges. Avoid tape on a newly refinished floor, as removing it may damage the finish. Instead, keep the floor covering in place without sticking tape directly to the surface.
Use tape where it protects suitable surfaces, such as when masking baseboards or window trim. Cover light fixtures, vents and built-ins against splatter, and keep tape away from vulnerable floor finishes.
- Keep coverings secure and inspect them as work progresses. Plastic can shift, while loose corners or folds can catch shoes and equipment. Walk across the protected route before painting, then reposition any sheet that slides or bunches.
- After sanding, remove debris before laying coverings. Grit beneath a sheet can scratch timber or tile. If furniture must be moved, lift it where possible rather than dragging it. Cover grouped furniture and leave a clear route for carrying brushes and paint.
For a painting project where floor and furniture protection matter, arrange professional painting.
RM Painting Services: Residential Painting
RM Painting Services provides residential painting for homeowners planning a room refresh or broader interior work. The team protects floors and furniture, cleans up daily and provides a clear quote before work begins. This preparation helps keep the work area orderly while painting is under way.
For a project in a lived-in home, discuss the rooms involved, floor surfaces and any furniture that needs protection. RM Painting Services also provides interior, commercial and exterior painting in Tralee and across County Kerry.
If you’re planning a painting project, contact RM Painting Services to discuss the work and request a clear quote. For more on budgeting and preparing your home, see this guide to a clean house painting service.
Plan a smoother painting project
Understanding how painters protect floors can help you prepare your home before work begins. Think about how each room will be used during the project: where people need to walk, which furniture must stay in place and whether the work can be arranged room by room. These details help shape a practical plan around your household routine.
Before painting starts, decide which areas need to remain accessible and move personal items out of the work zone. Note any delicate floor finishes or furnishings that need particular care so they can be considered during preparation. An agreed plan helps keep the work area organised and reduces avoidable disruption.
For support with a residential, interior or commercial painting project, contact RM Painting Services to discuss your requirements. With the right preparation in place, you can look forward to refreshed rooms and a more orderly process.
Frequently Asked Questions
How Are Furniture and Fixtures Covered?
Move small belongings, then cover furniture that must remain in the room. Use plastic sheeting, clean drop cloths or protective covers, secured so they don’t slip during work. Mask or cover fixtures, vents and built-ins to guard against splashes. For example, cover a fixed bookcase and mask nearby vents before painting the wall beside them.
How Do Professionals Prevent Dust and Debris?
During sanding, dust extraction tools can help remove debris before painting. Vacuum and wipe the area to prevent dust spreading across the floor or becoming trapped beneath coverings. Keep sanding tools and collected dust away from clean materials, and clear the work area before laying out paint supplies. A tidy transition between sanding and painting helps limit tracked dust.
Is DIY Protection Enough?
DIY protection can suit a small, straightforward job, such as painting one wall with the furniture removed. Larger projects involve more walkways, equipment and floor surfaces to manage, so coverings need regular attention as work moves around. In Tralee, Kerry, consider the project’s size and whether you can keep work areas orderly throughout.
Plastic drop sheet vs canvas drop sheet: which is better?
Canvas suits areas where grip and absorbency matter; plastic provides a waterproof barrier but can shift more easily. For example, canvas is practical on a smooth floor where people need to walk, while plastic can help contain a spill beneath a paint tray. Choose according to the floor finish and likely mess, then keep the covering flat.
What materials do painters use to protect floors?
Painters use materials such as canvas drop sheets, plastic sheeting, flooring paper, card protection and carpet film. The right choice depends on the surface and task. Carpet film adheres to carpet, canvas can absorb drips, and card provides a firmer layer on hard floors. A combination, such as film beneath a drop sheet, can protect a busy carpeted work zone.
How do painters protect hardwood floors from paint and scratches?
Start with a clean, dry hardwood floor, then lay stable protection that won’t bunch underfoot. Remove dust first, as trapped grit can scratch the finish. Avoid tape on newly refinished flooring because it can damage the finish. Lift furniture rather than dragging it, and place paint trays on an additional protective layer.
Pingback: Painting a Home While Living in It: How to Manage Fumes, Kids and Sleep – RM Painting Services